Categories
Photo Editing

Common Photo Editing Mistakes and How to Avoid Them

Basic Photo Editing Mistakes and Simple Fixes

Photo editing is a powerful tool that can transform an ordinary image into an extraordinary one. With the increasing accessibility of editing software, more people are delving into the world of photo enhancement. However, even the most enthusiastic amateur photographers can fall prey to common editing mistakes. These errors can detract from the overall quality of the image and undermine the photographer’s original vision. In this article, we’ll explore some of the most frequent photo editing mistakes and provide straightforward solutions to avoid them. By understanding and addressing these issues, you can ensure that your photos always look their best and accurately reflect the moments you intended to capture.

Section 1: Over-Editing

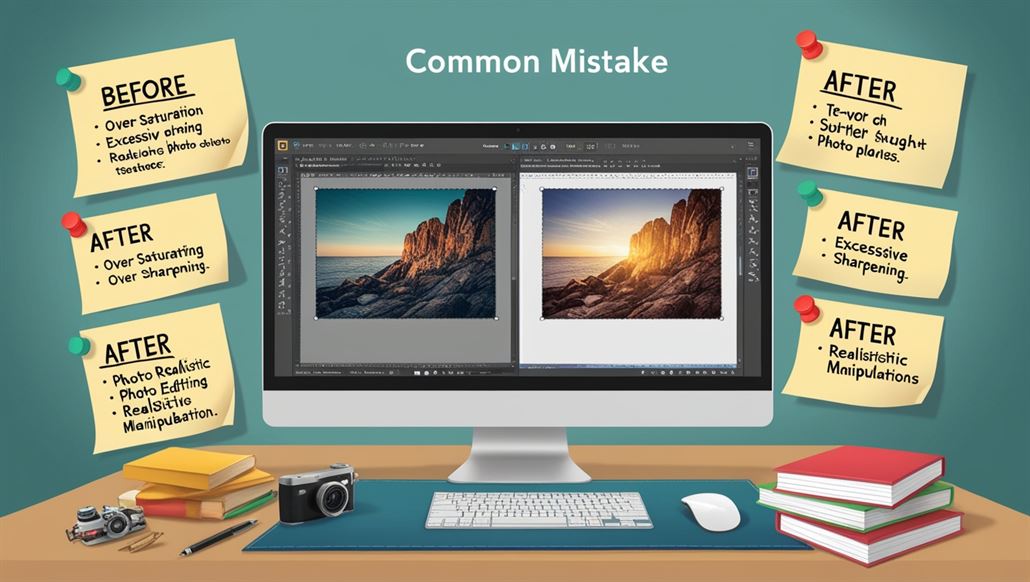
One of the most prevalent photo editing mistakes is over-editing. This occurs when too many adjustments are made to an image, resulting in an unnatural or unrealistic look. Over-editing can include excessive use of sharpening, contrast, or saturation tools, which can distort the original intent of the photo. To avoid editing errors, it’s crucial to maintain a balance and enhance the photo while preserving its natural essence.

Pitfalls of Over-Editing:

  • Loss of Detail: Over-editing can cause details in the image to be lost, especially when using tools like sharpening or clarity excessively.
  • Unnatural Appearance: Images can end up looking overly processed or fake, which can detract from their appeal.
  • Viewer Distraction: The goal of a photo is often to convey a message or emotion. Over-editing can distract viewers from this message.

Tips for Maintaining a Natural Look:

  • Use Subtle Adjustments: Make small, incremental changes rather than drastic ones. This helps in preserving the natural look of the photo.
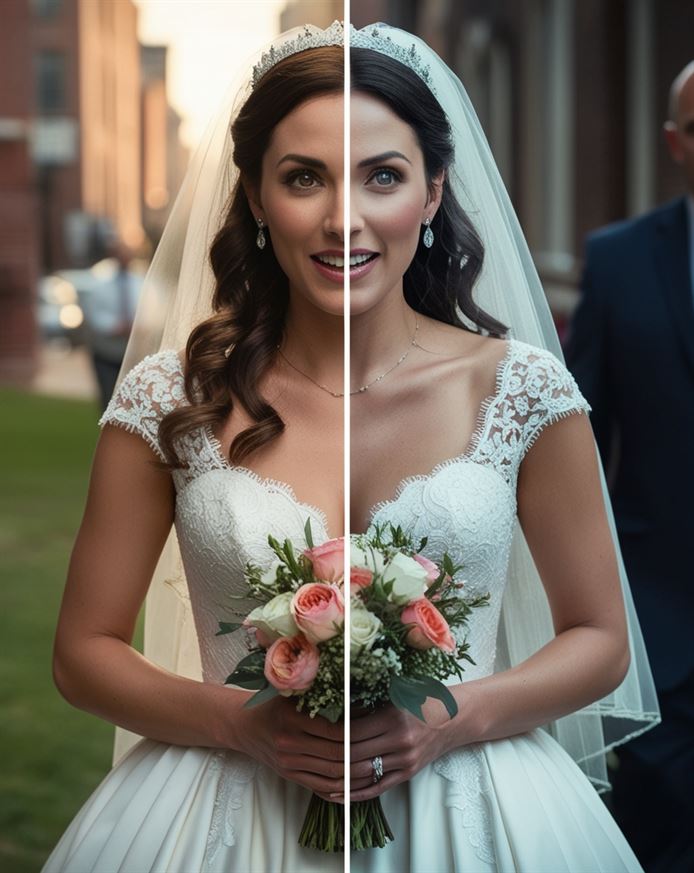
  • Check Before and After: Always compare the edited photo with the original to ensure that the changes enhance rather than overpower the image.
  • Avoid Extreme Settings: Be cautious with sliders and settings in your editing software. Avoid pushing them to their extremes.

By being mindful of these tips, you can avoid the common photo editing mistakes associated with over-editing and maintain a natural, authentic look in your images.

Section 2: Ignoring the Original Quality

Another common photo editing mistake is ignoring the original quality of the image. Starting with a low-quality image makes it challenging to achieve a high-quality final product, regardless of your editing skills.

Importance of Starting with a High-Quality Image:

  • Editing Flexibility: Higher-quality images provide more data to work with, allowing for better adjustments.
  • Professional Results: High-resolution, well-lit photos look more professional and polished after editing.

Tips on Ensuring Good Original Quality:

  • Proper Lighting: Ensure your photos are taken in good lighting conditions. Natural lighting is frequently the best option.
  • High Resolution: Use a camera with a high resolution to capture more detail.
  • Steady Shots: Use a tripod or stabilize your camera to avoid blurriness.

By starting with a high-quality image, you can minimize the photo editing mistakes that arise from trying to fix fundamental issues, making the editing process smoother and more effective.

Section 3: Overuse of Filters

The overuse of filters is a frequent photo editing mistake, especially with the prevalence of social media apps that offer a variety of filter options. While filters can enhance an image, using them excessively can result in an artificial look.

Common Mistake of Overusing Filters:

  • Loss of Originality: Filters can sometimes overshadow the original elements of the photo, making it look generic.
  • Unrealistic Effects: Overusing filters can create unrealistic colors and tones, detracting from the photo’s natural beauty.

Tips on Using Filters Subtly and Effectively:

  • Choose the Right Filter: Select a filter that complements the image without drastically changing its appearance.
  • Adjust Intensity: Most editing software allows you to adjust the intensity of filters. Use this feature to apply filters more subtly.
  • Combine with Other Adjustments: Instead of relying solely on filters, combine them with other edits like brightness, contrast, and color correction for a balanced look.

By using filters sparingly and thoughtfully, you can avoid one of the most common photo editing mistakes and enhance your images in a more natural and appealing way.

Section 4: Incorrect Cropping

Incorrect cropping is another photo editing mistake that can significantly impact the composition and focus of your image. Poor cropping can cut out essential elements or create awkward framing.

Impact of Poor Cropping:

  • Loss of Context: Important parts of the image may be lost, affecting the overall story or message.
  • Unbalanced Composition: Cropping can throw off the balance and symmetry of the photo, making it less visually appealing.
  • Reduced Resolution: Over-cropping can reduce the image’s resolution, leading to a lower-quality final product.

Tips on Proper Cropping Techniques:

  • Maintain Key Elements: Ensure that the main subjects and important elements remain within the frame.
  • Follow Composition Rules: Use rules like the rule of thirds to guide your cropping and enhance the photo’s balance.
  • Check Resolution: Be mindful of how much you crop to avoid reducing the image’s resolution excessively.

By following these tips, you can avoid the photo editing mistakes related to incorrect cropping and maintain the integrity and impact of your images.

Section 5: Poor Color Correction

Poor color correction is a common photo editing mistake that can result in unnatural-looking images. Over-saturation, incorrect white balance, and inconsistent tones are typical errors that can detract from your photo’s appeal.

Common Editing Issues:

  • Over-Saturation: Excessively increasing saturation can lead to unrealistic and harsh colors.
  • Incorrect White Balance: Failing to adjust white balance correctly can result in images with unnatural color casts.
  • Inconsistent Tones: Inconsistent color tones can make an image look unprofessional and poorly edited.

Tips on Achieving Natural Color Correction:

Mass Image Compressor Compressed this image. https://sourceforge.net/projects/icompress/ with Quality:80
  • Use Reference Points: Use neutral colors like white, gray, or black in the image as reference points to adjust white balance.
  • Adjust Incrementally: Make small adjustments to saturation, contrast, and brightness to achieve a balanced look.
  • Check Skin Tones: When editing photos of people, ensure that skin tones look natural and consistent.

By focusing on natural color correction, you can avoid common photo editing mistakes and enhance your images’ visual appeal.

Section 6: Neglecting Image Resolution

Neglecting image resolution is a photo editing mistake that can affect the quality of your photos across different platforms. Maintaining the appropriate resolution is crucial for preserving the image’s clarity and detail.

Importance of Maintaining Resolution for Different Platforms:

  • Print vs. Digital: Different platforms require different resolutions. High resolution is needed for print, while web images need to be optimized for faster loading times.
  • Quality Retention: Maintaining resolution ensures that your images retain their quality when viewed on various devices.

Tips on Resizing and Exporting Images Without Losing Quality:

  • Use Proper Dimensions: Set the correct dimensions based on where the image will be used (print, web, social media).
  • Export in the Right Format: Choose formats that preserve quality, such as PNG for web and TIFF for print.
  • Check Resolution: Ensure that you are exporting images at the correct resolution (e.g., 300 dpi for print).

By maintaining the appropriate resolution, you can avoid the photo editing mistakes related to image quality and ensure your photos look their best across different platforms.

Section 7: Overlooking Details

Overlooking small details is a photo editing mistake that can detract from the overall quality of your image. Blemishes, distractions in the background, and other minor issues can impact the viewer’s experience.

Common Overlooked Details:

  • Blemishes and Imperfections: Small blemishes on subjects can be distracting if not corrected.
  • Background Distractions: Unwanted objects or people in the background can take focus away from the main subject.
  • Inconsistent Edits: Inconsistent editing, such as uneven lighting or color correction, can make the photo look unprofessional.

Tips on Meticulous Editing and Final Checks:

  • Zoom In: Zoom in on different parts of the image to spot and correct small details.
  • Use Spot Healing: Utilize tools like the spot healing brush to remove blemishes and imperfections.
  • Review and Refine: Take time to review your edits and make final adjustments to ensure consistency and quality.

By paying attention to these details, you can avoid common photo editing mistakes and ensure your images are polished and professional.

Conclusion

Avoiding common photo editing mistakes is essential for producing high-quality images that accurately convey your intended message and emotions. By being mindful of over-editing, starting with high-quality images, using filters subtly, cropping correctly, achieving natural color correction, maintaining resolution, and paying attention to small details, you can enhance your photos effectively. Remember, the key to successful photo editing is to enhance the image without detracting from its original essence. 

Categories
Photo Editing

Top Photo Editing Trends in 2024

In the ever-evolving world of photography, staying updated with the latest photo editing trends is crucial for both professional photographers and enthusiasts. As we step into 2024, several new and exciting trends are shaping the way we edit and enhance our photos. From advanced AI tools to retro styles, the photo editing landscape is more dynamic than ever. In this blog post, we’ll explore the top photo editing trends in 2024, ensuring you stay ahead of the curve.

1. AI-Powered Editing Tools

Artificial Intelligence (AI) continues to revolutionize the photo editing industry. In 2024, AI-powered editing tools are becoming more sophisticated, offering photographers incredible precision and ease of use. These tools can automatically adjust lighting, remove unwanted objects, and enhance image quality with just a few clicks. AI is particularly beneficial for batch editing, saving photographers hours of manual work.

AI-based applications like Adobe Photoshop’s Sensei and Skylum’s Luminar Neo are leading the way, providing advanced features such as sky replacement, skin retouching, and object recognition. These tools analyze the content of your photos and make intelligent adjustments, resulting in stunning, professional-quality images. The integration of AI in photo editing trends is a game-changer for 2024.

2. Retro and Vintage Aesthetics

Nostalgia is a powerful force, and in 2024, retro and vintage aesthetics are making a strong comeback. These styles, reminiscent of the film photography era, are characterized by muted tones, grainy textures, and soft focus. Photographers are increasingly using filters and presets that emulate the look of old-school film cameras, adding a timeless charm to their digital photos.

Apps like VSCO and Instagram offer a variety of vintage filters, making it easy for users to achieve this look. Whether you’re aiming for the faded colors of the 70s or the high contrast of the 90s, retro editing styles are perfect for creating a sense of nostalgia and authenticity in your photos. This resurgence in retro aesthetics is a clear highlight among the photo editing trends of 2024.

3. Minimalist and Clean Editing

In contrast to the bold and dramatic, minimalist and clean editing is another major trend in 2024. This style emphasizes simplicity, clarity, and elegance. It involves reducing distractions in the image, enhancing natural light, and emphasizing the subject. The goal is to create a clean and uncluttered look that highlights the beauty of the subject without overwhelming the viewer.

Minimalist editing is particularly popular in lifestyle and product photography. Tools like Adobe Lightroom are ideal for achieving this look, allowing photographers to make subtle adjustments to exposure, contrast, and color balance. The result is a polished, professional image that speaks volumes through its simplicity. Embracing minimalist styles is essential in the photo editing trends for this year.

4. Mobile Editing Advancements

With smartphones becoming more powerful, mobile photo editing has seen significant advancements. In 2024, mobile editing apps are equipped with features that were once exclusive to desktop software. Photographers can now edit RAW files, apply advanced filters, and use AI-powered tools directly on their smartphones.

Apps like Snapseed, Lightroom Mobile, and Darkroom offer robust editing capabilities, making it easier than ever to edit photos on the go. These apps provide a range of tools for fine-tuning images, from basic adjustments to advanced retouching. The convenience of mobile editing allows photographers to capture, edit, and share their work from anywhere, making it a must-have skill in the digital age. Mobile editing is certainly among the top photo editing trends of 2024.

5. Enhanced Color Grading

Color grading has always been a critical aspect of photo editing, and in 2024, it’s taking center stage. Enhanced color grading techniques allow photographers to create mood, convey emotions, and tell stories through their images. This trend involves adjusting the hues, saturation, and luminance of specific colors to achieve a desired look and feel.

Photographers are using color grading to create cinematic effects, with teal and orange tones being particularly popular. These colors complement each other and create a visually appealing contrast. Software like DaVinci Resolve and Adobe Premiere Pro are widely used for advanced color grading, offering precise control over every aspect of color in your photos. Enhanced color grading is a standout among the photo editing trends this year.

6. 3D Photo Editing

As technology advances, 3D photo editing is emerging as a fascinating trend in 2024. This technique involves creating depth and dimension in photos, making them appear more lifelike and immersive. 3D photo editing is especially popular in the fields of advertising, gaming, and virtual reality.

Software like Blender and Adobe Dimension allow photographers to experiment with 3D elements, adding layers and textures to their images. This trend is not just about making photos look realistic; it’s about pushing the boundaries of creativity and exploring new ways to engage the audience. The rise of 3D editing is a notable development in the photo editing trends of 2024.

7. Motion Graphics and Cinemagraphs

Motion graphics and cinemagraphs are blending the worlds of photography and video, creating dynamic and captivating content. Cinemagraphs are still photos with subtle, repeated movements, while motion graphics involve adding animated elements to static images. These techniques are gaining popularity on social media platforms, where eye-catching content is essential for engagement.

Tools like Adobe After Effects and Plotaverse make it easy to create motion graphics and cinemagraphs. These tools offer a range of features for adding movement to your photos, whether it’s a flowing waterfall, a flickering candle, or animated text. Incorporating motion into your photos can make them stand out and attract more attention from your audience. This integration of motion is a key aspect of the photo editing trends in 2024.

8. Personalized Presets and Filters

Personalized presets and filters are becoming increasingly popular among photographers in 2024. These tools allow photographers to create a consistent look across their portfolio, making it easier to establish a unique style. Personalized presets are custom settings that can be applied to multiple photos, ensuring a cohesive aesthetic.

Platforms like Lightroom and Capture One offer extensive libraries of presets, and many photographers create and sell their own custom presets. Using personalized presets not only saves time but also helps in building a recognizable brand. Whether you prefer moody and dark tones or bright and airy colors, there’s a preset for every style. The trend of using personalized presets is highly significant in the 2024 photo editing trends.

9. HDR and Dynamic Range

High Dynamic Range (HDR) photography continues to be a significant trend in 2024. HDR techniques involve capturing multiple exposures of the same scene and merging them to create a single image with a greater dynamic range. This process brings out details in both the highlights and shadows, resulting in a more balanced and visually striking photo.

HDR is particularly useful in landscape and architectural photography, where the lighting conditions can be challenging. Software like Aurora HDR and Photomatix are designed specifically for HDR processing, offering tools to merge exposures and fine-tune the final image. The result is a photo that captures the full spectrum of light, from the brightest highlights to the deepest shadows. HDR remains a staple in the photo editing trends of 2024.

10. Social Media Integration

In 2024, social media continues to influence photo editing trends. Photographers are increasingly tailoring their edits to suit specific platforms like Instagram, TikTok, and Pinterest. This involves understanding the unique aesthetics and audience preferences of each platform and editing photos accordingly.

For example, Instagram favors bright and vibrant images, while TikTok trends often lean towards creative and experimental edits. Tools like Canva and InShot offer easy-to-use templates and filters designed for social media, making it simple to create platform-specific content. Integrating social media trends into your editing process can help boost engagement and reach a wider audience. Social media influence is undeniable in the photo editing trends of this year.

11. Black and White Photography

Black and white photography is timeless, and in 2024, it’s making a strong resurgence. Stripping away color forces viewers to focus on composition, contrast, and texture, resulting in powerful and evocative images. Black and white editing is particularly popular in portrait and street photography, where it can add depth and emotion.

Editing black and white photos involves more than just desaturating the image. Photographers use tools to adjust contrast, highlights, shadows, and clarity to enhance the details. Software like Silver Efex Pro and Lightroom offer advanced features for black and white editing, allowing photographers to create striking monochrome images. The resurgence of black and white photography is a notable inclusion in the photo editing trends of 2024.

12. Environmental Awareness and Ethical Editing

As awareness of environmental issues grows, ethical editing is becoming an important trend in 2024. Photographers are increasingly mindful of how their work represents the natural world, opting for edits that reflect reality rather than distort it. This involves avoiding excessive retouching, preserving natural colors, and maintaining the integrity of the scene.

Environmental awareness also extends to the choice of subjects and locations. Photographers are focusing on capturing the beauty of nature and raising awareness about environmental conservation through their work. Ethical editing is about finding a balance between enhancing the photo and staying true to the original scene. This trend towards ethical practices is crucial among the photo editing trends in 2024.

Conclusion

The photo editing trends in 2024 reflect a blend of advanced technology and timeless aesthetics. From AI-powered tools and 3D editing to retro styles and ethical practices, photographers have a wide array of techniques at their disposal. Staying updated with these trends not only enhances your photography skills but also keeps your work relevant in a rapidly evolving industry. Embrace these trends, experiment with new techniques, and let your creativity shine through in every photo you edit.

Categories
Photo Editing

How to Choose the Right Photo Editing Service for Your Business

Choosing the right photo editing service for your business can be a game-changer. With the abundance of options available, it’s crucial to find a service that meets your specific needs. This guide will help you navigate through the process of choosing a photo editing service, ensuring you make an informed decision that benefits your business in the long run.

Understanding Your Needs

Before you start attempting to find a photograph editing service, it’s essential to understand your particular needs. Different groups require one of a kind sorts of photo enhancing. For example, an e-trade enterprise might also want history removal and colour correction, at the same time as a actual property company may want HDR photograph merging and sky alternative.

Start by making a listing of the forms of photo editing you want. This will assist you chop down your options and find a provider that makes a speciality of the ones regions. Remember, selecting picture modifying provider manner locating one that aligns perfectly together with your enterprise dreams.

Consider the frequency and quantity of your picture modifying necessities. Are you searching out a one-time carrier, or do you need ongoing support? Understanding the dimensions of your needs can assist in deciding on image editing service that is scalable and might grow along with your business

Quality of Work

Quality should be your top priority when choosing photo editing service. High-quality photographs have a big impact on how people perceive your brand.  Look for services that provide samples of their work. This will give you a good idea of their capabilities and whether they can meet your standards.

Check their portfolio and see if their style matches what you’re looking for. Reviews and testimonials can also provide information about the quality of their service. When it comes to choosing photo editing service, never compromise on quality.

Consider conducting a small test project with a few shortlisted services to compare the quality of work firsthand. This can be a simple way to ensure that the provider can meet your expectations before making a long-term commitment.

Turnaround Time

Timing is critical in today’s fast-paced environment. You need a photo editing service that can deliver high-quality work within your deadlines. Ask potential services about their turnaround times and whether they offer expedited services for urgent projects.

Be realistic about your needs and find a balance between speed and quality. Choosing photo editing service involves finding a provider who can consistently meet your deadlines without sacrificing quality.

Discuss with the service provider about their process and how they handle peak periods or rush jobs. Understanding their workflow and capacity can give you confidence in their ability to deliver on time.

Pricing

Pricing is another critical factor to consider. Photo editing services can vary widely in cost, so it’s essential to find one that fits within your budget. However, be wary of services that are significantly cheaper than the average market rate. They might be cutting corners, which can affect the quality of the final product.

Get quotes from multiple services and compare their pricing structures. Make sure you understand what’s included in the price and whether there are any additional fees for revisions or expedited services. When choosing photo editing service, ensure you’re getting good value for your money.

Consider the payment structure—whether it’s per image, per hour, or a subscription model. Choose the one that aligns best with your business’s financial planning and project scope.

Communication and Customer Service

Good communication is crucial when working with a photo editing service. You need a provider who is responsive and easy to communicate with. This ensures that any changes or adjustments can be made quickly and efficiently.

Test their customer service by reaching out with questions before committing. Their responsiveness and willingness to help can be a good indicator of what it will be like to work with them. Choosing photo editing service with excellent communication can save you a lot of headaches down the line.

Establish clear communication channels and points of contact. Having a dedicated account manager or a primary point of contact can streamline the process and reduce misunderstandings.

Technology and Tools

The technology and tools used by a photo editing service can significantly impact the quality and efficiency of their work. Ensure that the service you choose uses up-to-date software and equipment. This can make a big difference in the final product.

Ask about the tools they use and whether they have any specialized software for specific types of editing. Choosing photo editing service that uses advanced technology ensures you get the best possible results.

Inquire about their process for staying updated with the latest trends and technological advancements in photo editing. A service that invests in continuous learning and improvement is likely to provide superior results.

Experience and Expertise

Experience and expertise are crucial factors to consider. A service with a proven track record is more likely to deliver high-quality work consistently. Look for providers with experience in your specific industry, as they will be more familiar with the nuances and requirements of your projects.

Check their credentials and see how long they’ve been in business. Experienced providers are usually better equipped to handle complex editing tasks. When choosing photo editing service, opt for one with a strong reputation and a wealth of experience.

Consider the team’s qualifications and training. A well-trained team with specialized skills can provide higher quality and more creative solutions to your photo editing needs.

Flexibility and Customization

Every business has unique needs, and your photo editing service should be able to accommodate them. Look for providers who offer flexible and customizable services. This allows you to tailor their offerings to suit your specific requirements.

Discuss your needs in detail and see if they are willing to adapt their services to meet them. Choosing photo editing service that offers customization ensures you get exactly what you need.

Flexibility can also refer to their ability to handle different types of projects, from simple edits to complex composites. A versatile service provider can be a valuable partner as your needs evolve.

Confidentiality and Security

Confidentiality and security are critical, especially if you’re dealing with sensitive images. Ensure that the photo editing service you choose has robust security measures in place to protect your files. This includes secure file transfer methods and confidentiality agreements.

Ask about their security protocols and how they handle your data. Choosing photo editing service with strong security measures gives you peace of mind.

Consider their data backup and recovery procedures. Knowing that your files are safe and can be retrieved in case of any issues is an added layer of security.

Scalability

As your business grows, your photo editing needs may also increase. It’s important to choose a service that can scale with you. Look for providers who have the capacity to handle larger volumes of work as your business expands.

Discuss their scalability and whether they can accommodate increased workloads in the future. Choosing photo editing service that can grow with your business ensures long-term success.

Scalability also involves the service provider’s ability to adapt to new trends and technologies, ensuring they can continue to meet your evolving needs.

Trial and Testing

Before committing to a photo editing service, it’s a good idea to test their capabilities. Many providers offer free trials or sample edits. Take advantage of these offers to assess their quality, speed, and overall fit for your needs.

Use the trial period to communicate with them and see how responsive and flexible they are. This hands-on experience can be invaluable when choosing photo editing service.

During the trial, pay attention to how they handle feedback and revisions. A service provider who is open to constructive criticism and can make adjustments quickly is likely to be a good long-term partner.

Building a Long-Term Relationship

Once you’ve chosen a photo editing service, think about building a long-term relationship with them. Consistency in photo editing style and quality is important for your brand. Working with the same service over time can help ensure this consistency.

Regularly review their performance and provide feedback. Open communication and constructive feedback can help improve the quality of their service and make the partnership more beneficial for both parties.

The Importance of Choosing the Right Photo Editing Service

Choosing the right photo editing service is not just about finding someone who can edit photos. It is about finding a partner who understands your vision and can make it a reality. The right service can enhance your brand image, improve customer satisfaction, and ultimately drive more sales.

On the other hand, choosing the wrong service can lead to poor quality images, missed deadlines, and a lot of frustration. It can also harm your brand’s reputation and cost you more in the long run.

Making the Final Decision

After considering all the factors mentioned above, you should have a good idea of which photo editing service is the best fit for your business. Take your time to make the final decision. Don’t rush the process. It’s better to spend a little more time now to find the right service than to face problems down the line.

Remember, the goal is to find a photo editing service that can meet your needs, deliver high-quality work, and grow with your business. By following this guide, you’re well on your way to making a well-informed decision.

Conclusion

Choosing the right photo editing service for your business is a crucial decision that can significantly impact your brand’s image and success. By considering factors such as quality, turnaround time, pricing, communication, technology, experience, flexibility, confidentiality, scalability, and testing, you can make an informed decision.

Remember, choosing photo editing service is not just about finding the cheapest option. It’s about finding a partner who understands your needs and can deliver high-quality work consistently. Take your time, do your research, and choose a service that aligns with your business goals and values.

By following this guide, you’ll be well-equipped to choose a photo editing service that meets your needs and helps your business thrive. Happy editing!

Choosing the right photo editing service is an investment in your brand’s future. The right service can help you create stunning visuals that attract and engage customers, setting you apart from the competition. So, take the time to choose wisely and invest in a service that will help your business grow and succeed.

Categories
Photography

The Benefits of Outsourcing Photo Editing for Professional Photographers

Hey guys! So, if you’re a professional photographer and always busy capturing those perfect moments, let’s talk about something that might just make your life a whole lot easier—outsourcing photo editing. Trust me, once you get into this, you’ll see how it can totally streamline your workflow and let you focus on what you do best. Let’s dive into why outsourcing photo editing is a game-changer for professional photographers.

1. Enhanced Workflow Efficiency

You know how it is—hours and hours stuck in front of the computer editing photos. But what if you could hand that off to someone else? Outsourcing photo editing means you can focus on clicking and chilling with your clients. This way, you get to book more gigs and provide top-notch service.

When your workflow is smooth, you can juggle more clients and projects, no sweat. This not only boosts your productivity but also your profits. Plus, you get more time to hone your skills and grow your business instead of getting stuck in repetitive tasks.

2. Consistent Quality and Style

Staying consistent with your photo style is super important for your brand. When you outsource to a pro service, your photos get that high-standard, consistent editing. This consistency helps build your brand identity and keeps your clients happy with that signature look they love.

Consistency in your edits means a cohesive portfolio that screams your style. Clients love that and it builds trust. Plus, it helps you stand out in a sea of photographers.

3. Access to Advanced Tools and Expertise

Professional photo editing services have all the latest software and fancy tools that might be too expensive or complex for you to handle solo. Plus, these guys are pros at advanced techniques, so your photos get top-tier treatment.

They’ve got all the cool tools and skills to do stuff you might not even think of. Complex retouching, color grading, special effects—you name it. This way, you can offer your clients something extra special.

4. Cost-Effective Solution

It might seem like an extra expense, but outsourcing photo editing is actually cost-effective in the long run. You save time, take on more projects, and increase your income. Plus, the quality of outsourced editing means fewer revisions and happier clients, saving you time and money.

Think about it: the time you spend editing could be used for more shoots or client meetings. Outsourcing lets you focus on what you love and still grow your business.

5. Faster Turnaround Time

Clients love getting their photos quickly. Outsourcing photo editing means faster delivery times. Professional services can handle large volumes efficiently, so you meet deadlines without compromising on quality.

Quick delivery is a big plus for clients. It keeps them happy and can lead to more referrals and repeat business. With outsourcing, you can deliver high-quality work on time, every time.

6. Focus on Core Photography Skills

By outsourcing editing, you free up time to perfect your photography skills. You can focus on capturing stunning images and improving your techniques, which leads to better quality work and a stronger portfolio.

Without the editing burden, you can experiment with new techniques and styles, making your work even more amazing. This keeps you ahead in the game and continuously improving.

7. Flexibility and Scalability

Photo editing needs can vary—sometimes it’s crazy busy, other times not so much. Outsourcing offers flexibility. You can scale up or down based on demand, making it easier to manage your workload.

During peak seasons, like wedding season, the editing workload can be nuts. Outsourcing helps you handle this without breaking a sweat. And in slower times, you save costs by scaling down.

8. Stress Reduction

Editing can be a real pain, especially with tight deadlines. Outsourcing reduces stress and lets you enjoy the fun parts of your job. This leads to a better work-life balance and avoids burnout.

Repetitive editing tasks can be draining. By handing them off, you stay passionate about photography and avoid burnout. Less stress means better mental health and more creativity.

9. Competitive Advantage

In a competitive field, high-quality images delivered fast can set you apart. Outsourcing ensures your final product is polished and professional, giving you an edge over others.

Having an edge means attracting more clients and charging higher rates. Professional editing makes your portfolio shine, appealing to potential clients and making you stand out.

10. Improved Client Satisfaction

Happy clients are the key to a successful business. Outsourcing photo editing ensures your clients get beautifully edited photos that meet their expectations. This high level of service leads to repeat business and referrals.

Satisfied clients spread the word, bringing in more business. Happy clients also become loyal clients, returning for future projects. Professional editing helps build a positive reputation and attract new clients.

11. Specialization and Expertise

Outsourcing to specialists who focus solely on editing brings a level of expertise and detail you might struggle to achieve on your own. These pros stay updated with the latest trends and techniques, ensuring top-notch results.

Specialized editors can offer insights and enhancements you might not consider, adding extra value to your photos. Their expertise elevates your work, making it stand out even more.

12. Access to Diverse Editing Styles

Different projects need different editing styles. Outsourcing gives you access to various styles and techniques, letting you cater to a broader range of clients and their unique preferences.

Whether it’s a classic look for a wedding or a modern style for a commercial shoot, professional editing services offer the diversity you need. This attracts more clients and showcases your versatility.

13. Better Time Management

Outsourcing photo editing improves your time management. By delegating editing tasks, you can plan your schedule better and focus on other important aspects of your business, like marketing and client meetings.

Effective time management is crucial for growth. Outsourcing ensures you have time for strategic planning and critical activities, driving long-term success.

14. Global Talent Pool

Outsourcing opens up a global pool of skilled editors. You’re not limited to local talent—you can find the best fit for your needs and budget worldwide.

International editors bring diverse perspectives and techniques, enriching your work. This diversity leads to unique edits that stand out in the industry.

15. Increased Revenue Potential

With more time freed up, you can take on more clients and projects, boosting your revenue potential. Handling a higher volume without compromising quality leads to significant financial growth.

Increased revenue means more investment in your business—better equipment, marketing, or workshops to enhance your skills. Continuous investment leads to sustained growth.

16. High-Quality Output

Professional photo editing services deliver high-quality output. Their experience and expertise ensure your photos are edited to perfection, enhancing the overall quality of your work.

High-quality photos impress clients and can get you featured in top publications, exhibitions, and competitions, boosting your reputation and credibility.

17. Reduced Operational Costs

Outsourcing helps reduce operational costs. Instead of investing in expensive software and training, you rely on professional services with the necessary tools and expertise. This improves your profit margins.

Avoiding the costs of hiring and training in-house staff saves money. You can allocate resources to other growth-driving areas of your business.

18. Better Customer Service

With more free time, you can focus on providing better customer service. This includes quick responses to client inquiries, detailed consultations, and personalized services that meet each client’s unique needs.

Great customer service leads to higher satisfaction and loyalty. Focusing on clients’ needs builds strong relationships, resulting in repeat business and positive referrals.

19. Access to a Broader Range of Services

Many professional editing services offer a wide range of options, from basic adjustments to complex retouching and creative edits. This variety lets you offer more services to your clients.

Offering diverse services attracts more clients and provides extra revenue streams. Advanced retouching, special effects, or photo restoration enhance your value and appeal.

20. Peace of Mind

Knowing your photos are in professional hands gives you peace of mind. Trusting that editing will be top-notch allows you to focus on other important aspects of your business without worrying about quality.

This peace of mind leads to a more relaxed work experience. Delegating tasks reduces stress and lets you focus on your passion, leading to greater job satisfaction.

Conclusion

Outsourcing photo editing offers numerous benefits for professional photographers, from enhanced workflow efficiency to improved client satisfaction. Leveraging professional editors’ expertise ensures consistent quality, faster turnaround times, and a competitive edge in the industry. Embracing outsourcing can lead to a more successful and fulfilling photography career.

Incorporating outsourcing into your business model can transform your workflow and elevate your work quality. If you haven’t considered it yet, now might be the perfect time to explore the benefits of outsourcing photo editing.

How to Choose the Right Photo Editing Service

When deciding to outsource, it’s crucial to select a service that matches your style and quality standards. Here are some tips:

  1. Review Portfolios: Check potential services’ portfolios to ensure their style aligns with yours.
  2. Check Reviews and Testimonials: Client reviews and testimonials provide insight into the service’s reliability and quality.
  3. Request a Trial: Many services offer trial edits. Use this to assess their work quality.
  4. Evaluate Turnaround Time: Ensure the service can meet your deadlines without compromising quality.
  5. Consider Pricing: Compare pricing, but remember the cheapest option isn’t always the best. Focus on value and quality.

Frequently Asked Questions

Q: What types of photo editing can be outsourced?
A: You can outsource basic adjustments (color correction, exposure, contrast), advanced retouching (skin smoothing, blemish removal), and creative edits (compositing, special effects) to professional editing services.

Q: Is outsourcing photo editing secure?
A: Reputable services prioritize security and confidentiality. Look for secure file transfer methods and privacy assurances.

Q: How do I communicate my editing preferences?
A: Clear communication is key. Provide detailed instructions and examples of your preferred style. Some services offer style profiles to simplify this process.

Q: Can I still have control over the final edits?
A: Yes, many services allow revisions and feedback to ensure the final product meets your expectations.

Final Thoughts

Outsourcing photo editing can be a game-changer for photographers. It frees up time for capturing amazing shots and growing your business. By letting experts handle editing, you get consistent quality, faster delivery, and happier clients. So, consider outsourcing and see how it can elevate your photography career.

Categories
Photo Editing

10 Essential Photo Editing Tips for Beginners

Let’s Start With The Intro of The Title

Editing photos is an essential technique for anyone wanting to improve their photography. No matter if you’re a hobbyist, or aspiring professional, knowing the fundamentals of editing your photos can significantly enhance image quality. Photographs.

From changing brightness to eliminating undesirable aspects, mastering these basic techniques will give your photographs a professional, polished look.

We’ll go over the top 10 photo editing tips for beginners to help improve your photos to the next step.

Tip 1: Start with the Basics – Cropping and Straightening

Why It’s Important

Straightening and cropping are two fundamental editing techniques that will significantly improve the quality of your photos. Cropping allows you to remove unneeded elements and focus on your primary subject while straightening will ensure that your lines and horizons are in a straight line.

Detailed Explanation

Utilize the crop tools available in the majority of editing software to crop your image. Select the part you want to keep and cut the remainder. Keep in mind three-point rule to ensure an even composition. Straighten tools can be used to straighten your photo’s horizon, or vertical lines to straighten.

Visuals/Examples

Imagine a landscape photo where the horizon is slightly tilted. Straightening the horizon line will make the image more visually appealing and professional.

Tools/Software

  • Adobe Lightroom: Excellent for precise cropping and straightening.
  • Snapseed: A free mobile app with robust cropping and straightening tools.

Tip 2: Adjust Exposure and Brightness

Why It’s Important

Adjusting the brightness and exposure properly makes sure your image isn’t too dark or bright, allowing the specifics of your photograph to shine through.

Detailed Explanation

Make use of the exposure slider within your editing program to alter the overall brightness or lightness of your photograph. The adjustments to brightness can help refine the exposure by paying attention to the midtones. Be cautious not to overexpose because this could result in a loss of clarity.

Visuals/Examples

A photo taken in low light might appear too dark. Increasing the exposure and brightness can reveal hidden details and make the image more vibrant.

Tools/Software

  • Adobe Photoshop: Provides advanced exposure and brightness controls.
  • GIMP: A free alternative with comprehensive adjustment options.

Mastering The Art of Photo Editing

Tip 3: Enhance Colors with Saturation and Vibrance

Why It’s Essential

Enhancing colours can make your images more attractive and lively. Adjustments to vibrance and saturation help to bring out the natural colours in your photographs.

Detailed Explanation

Saturation boosts the brightness of the colours in your photograph and vibrance is a selective boost to the colors that aren’t as saturated. This helps to prevent over-saturation in already vibrant areas and preserves a the natural appearance.

Visuals/Examples

A photo of a landscape with dull colours can be changed by boosting the brightness and creating the greens of the grass and skies’ blues to appear more vibrant.

Tools/Software

  • Lightroom: Offers precise control over saturation and vibrance.
  • Canva: A user-friendly tool for quick colour adjustments.

Tip 4: Use the Healing Brush to Remove Blemishes

Why It’s Essential

Healing brushes let you to eliminate undesirable elements and imperfections to create a cleaner, more professional appearance.

Detailed Explanation

Choose the healing brush and then take a sample of your photograph. Paint over the blemish or unwelcome element then the tool blends it into the area of sampled, thereby eliminating it.

Visuals/Examples

Eliminating a stray pimple from a photo or an object that is distracting in the background could significantly improve the overall look and feel of your photograph.

Tools/Software

  • Photoshop: Offers a powerful healing brush tool.
  • Pixlr: A free online editor with a versatile healing tool.

Tip 5: Sharpen Your Images

Why It’s Essential

Sharpening can enhance the details and textures of your photos to make them appear sharper and more precise.

Detailed Explanation

Utilize the sharpening tool to enhance the brightness of the edges in your photo. Be cautious not to over-sharpen since this could result in unwelcome artefacts and create a grainy appearance.

Visuals/Examples

A slightly blurry photo can be improved by applying sharpening, making the details pop and giving the image a crisper look.

Tools/Software

  • Lightroom: Provides advanced sharpening controls.
  • Fotor: A free tool with easy-to-use sharpening options.

Tip 6: Adjust White Balance

Why It’s Essential

Correct white balance makes sure that the colours in your image appear natural and precise and match the lighting conditions in which the photograph was taken.

Detailed Explanation

Utilize the white balance tool to alter temperatures (warmth or coolness) and the tint of your image. This adjustment will fix colour casts that are caused by various lighting conditions.

Visuals/Examples

A photo taken indoors under artificial lighting might have a yellowish tint. Adjusting the white balance can make the colours look more natural.

Tools/Software

  • Photoshop: Offers precise white balance adjustment tools.
  • Lightroom: Easily adjusts white balance with a straightforward interface.

Tip 7: Use Layers for Non-Destructive Editing

Why It’s Essential

The use of layers lets you edit your photos in a non-destructive way which means that you can make adjustments without affecting the original photo.

Detailed Explanation

Create new layers to accommodate each edit or adjustment you make. This allows you to quickly undo any changes or alter specific layers without affecting your other edits.

Visuals/Examples

Editing a photo with multiple layers for exposure, colour correction, and sharpening allows you to fine-tune each aspect separately.

Tools/Software

  • Photoshop: The industry standard for layer-based editing.
  • GIMP: Also supports layer-based editing.

Tip 8: Experiment with Filters and Presets

Why It’s Essential

The filters and the presets you use can provide the photos you upload with a uniform appearance and feel, reducing time in editing repetitively and aiding in establishing your style.

Detailed Explanation

Explore the various effects and filters to discover how they impact your image. You can alter their intensity to match your preferences. These presets are particularly helpful for applying a particular style to multiple images.

Visuals/Examples

Applying a vintage filter to a series of photos can create a cohesive, nostalgic look.

Tools/Software

  • Lightroom: Offers a wide range of presets and the ability to create your own.
  • VSCO: Popular for its stylish filters and presets.

Tip 9: Resize and Export Correctly

Why It’s Essential

Resizing and exporting your photos correctly ensures they look good on different platforms and devices, maintaining quality and performance.

Detailed Explanation

When resizing, ensure the aspect ratio to prevent distortion. Select the right resolution that is appropriate for the intended purpose (e.g. print, web). Upload your photo in the appropriate file format (JPEG for general use, and PNG for backgrounds with transparent colors).

Visuals/Examples

The export of a high-resolution image to a website could improve the speed of loading and quality of images by selecting the appropriate size and size.

Tools/Software

  • Photoshop: Provides advanced resizing and export options.
  • Canva: Simple and effective for resizing and exporting images.

Tip 10: Save Your Work in Different Formats

Why It’s Essential

Making sure you save your work in multiple formats means you will have a backup copy of your work for any future revisions, and also a copy that is that is ready to share or print.

Detailed Explanation

Make a master copy of your edited image in a lossless file format like TIFF or PSD. Make a backup copy of the photo of your edited photo in JPEG or PNG to share it online or print. This technique preserves your initial edits and allows for future modifications.

Visuals/Examples

Having a high-quality TIFF file allows for further editing without losing quality, while a JPEG version is ready to upload to social media.

Tools/Software

  • Photoshop: Supports multiple file formats for saving.
  • GIMP: Also offers a variety of saving options.

Conclusion

Learning these 10 essential techniques for editing photos will improve your photography and give your photos a professional look.

Be sure to keep practising regularly and test different techniques to discover your style. When editing for pleasure or working on professional projects these suggestions will provide you with the foundation you can develop on.If you’re looking for more advanced editing or professional help, don’t hesitate to explore our services and other resources on Outsource The Photo Edit.

Categories
Photo Editing

Mastering The Art of Photo Editing

In today’s visually driven world, the power of a well-edited photo cannot be overstated. Photo editing transforms ordinary snapshots into extraordinary visuals, making it an essential skill for photographers, social media enthusiasts, digital marketers, and anyone who loves capturing moments.

With the right techniques, you can enhance the beauty, mood, and impact of your images, allowing them to tell compelling stories and evoke emotions. This comprehensive guide aims to equip both beginners and intermediate users with the knowledge and techniques necessary to master the art of photo editing.

Understanding Photo Editing Basics

What is Photo Editing?

Photo editing involves the process of altering images to enhance their appearance or achieve a specific effect.

This can range from simple adjustments like cropping and resizing to complex manipulations such as color correction, retouching, and compositing.

The ultimate goal is to improve the image while maintaining its authenticity and artistic integrity.

Common Photo Editing Software and Tools

Choosing the right software is crucial for effective photo editing. Here are some popular options:

  • Adobe Photoshop: Renowned for its versatility and extensive features, Photoshop is the preferred choice for many professional editors. It offers tools for detailed manipulation, retouching, and creative compositing.
  • Adobe Lightroom: Ideal for photographers, Lightroom provides powerful tools for organizing and editing photos, with a focus on batch processing and non-destructive editing.
  • GIMP: A free and open-source alternative to Photoshop, GIMP (GNU Image Manipulation Program) offers a wide range of editing tools suitable for both beginners and advanced users.
  • Mobile Apps: For those who prefer editing on the go, mobile apps like Snapseed, VSCO, and Adobe Photoshop Express offer robust editing capabilities.

Basic Concepts

  • Cropping and Resizing: These are fundamental editing actions that adjust the composition and dimensions of an image to better focus on the subject and improve framing.
  • Color Correction: This involves balancing the colors in an image to achieve a natural look, often through adjustments to white balance, saturation, and vibrance. Proper color correction can significantly enhance the mood and tone of an image.

Essential Photo Editing Techniques

Adjusting Brightness and Contrast

Brightness controls the overall lightness or darkness of an image, while contrast enhances the difference between light and dark areas. Proper adjustment of these settings can make an image more vivid and dynamic. Here’s how to approach these adjustments:

  1. Brightness: Increase or decrease to lighten or darken the image.
  2. Contrast: Enhance to make details stand out more, giving the image depth and dimension.

Working with Saturation and Vibrance

These settings control the intensity and richness of colors in your image.

  • Saturation: Adjusts the intensity of all colors. Be cautious, as too much saturation can make an image look unnatural.
  • Vibrance: Selectively adjusts the intensity of more muted colors, while protecting already vivid colors. This results in a more balanced and natural enhancement.

Sharpening and Noise Reduction

Sharpness enhances the clarity of details by increasing the contrast at edges. It’s essential for making details pop. However, too much sharpening can introduce unwanted artifacts.

  • Noise Reduction: Essential for cleaning up images taken in low light conditions, noise reduction tools help remove graininess and make the image smoother.

Understanding and Using Layers and Masks

Layers allow you to separate different elements of your edit, making it easier to manage and modify specific parts of your image without affecting the whole. Masks enable precise control over where edits are applied, allowing for non-destructive editing.

  • Layers: Think of them as transparent sheets stacked on top of your image. You can edit each layer independently.
  • Masks: Used to hide or reveal parts of a layer. Black conceals, white reveals, and various shades of gray partially conceal.

Advanced Photo Editing Skills

Retouching and Skin Smoothing

Retouching involves removing imperfections and enhancing features to achieve a polished look. Skin smoothing is a common retouching task, aimed at reducing blemishes and achieving an even skin texture.

  • Tools: Use the healing brush, clone stamp, and frequency separation techniques in Photoshop for detailed retouching.

Removing Objects and Backgrounds

Removing unwanted objects or backgrounds can clean up an image and help focus on the subject. Advanced tools in Photoshop, such as the clone stamp, content-aware fill, and the pen tool, allow for precise removals.

  • Clone Stamp: Copies pixels from one part of an image to another.
  • Content-Aware Fill: Automatically fills in selected areas by analyzing surrounding pixels.

Adding Filters and Effects

Filters and effects can transform the look and feel of an image. Common effects include vintage looks, black and white conversions, and HDR (High Dynamic Range) enhancements.

  • Filters: Pre-made settings that apply a certain look to your image.
  • Effects: More complex adjustments that often combine multiple edits for a specific style.

Creating Composite Images

Composite images involve combining elements from multiple photos to create a single, cohesive image. This technique requires skill in masking, layering, and blending to ensure the final image looks natural.

  • Blending Modes: Adjust how layers interact with each other.
  • Layer Masks: Essential for seamlessly blending different images together.

Tips for Effective Photo Editing

Keep Edits Natural and Subtle

While it’s tempting to apply dramatic edits, subtle adjustments often yield the best results. Aim to enhance the image while preserving its natural look.

  • Less is More: Over-editing can detract from the image’s authenticity.
  • Enhance, Don’t Overpower: Make adjustments that highlight the strengths of the original photo.

Use Presets and Custom Settings

Presets can save time and ensure consistency, especially when editing batches of photos. Custom settings allow for fine-tuning to match your unique style.

  • Presets: Predefined settings that can be applied with a single click.
  • Custom Settings: Fine-tune adjustments for a more personalized touch.

Consistency in Style and Tone

Develop a consistent editing style that reflects your personal or brand identity. This helps create a cohesive portfolio or social media feed.

  • Signature Style: Establishing a recognizable editing style can help differentiate your work.
  • Tone Consistency: Maintain similar color tones and contrasts across your images.

Workflow and Organization Tips

Organizing your photos and edits systematically can improve efficiency and productivity.

  • Cataloging: Use features in software like Lightroom to tag and categorize images.
  • Backup: Always backup your original files and edits to prevent data loss.

Common Mistakes to Avoid

Over-Editing

Excessive use of filters, saturation, and sharpness can make images look unnatural. Strive for a balance that enhances the image without overwhelming it.

  • Natural Look: Aim for edits that enhance without being obvious.
  • Balance: Find a middle ground between too little and too much editing.

Ignoring the Original Image Quality

Starting with a high-quality image is crucial. Low-resolution images limit the extent and quality of edits you can perform.

  • High Resolution: Ensure your original images are of good quality to allow for effective editing.
  • Detail Preservation: Avoid edits that degrade the image quality.

Inconsistent Style

Jumping between different editing styles can confuse your audience. Establish a signature style that represents your vision.

  • Cohesive Portfolio: Maintain a consistent look across your work.
  • Brand Identity: Develop a style that reflects your personal or brand identity.

Not Saving the Original Files

Always keep a copy of the original image before making edits. This allows you to revert back or re-edit if necessary.

  • Non-Destructive Editing: Use tools and techniques that don’t alter the original image.
  • Original Backup: Keep an unedited version of every photo.

Tools and Resources

Recommended Software and Tools

  • Adobe Photoshop: For comprehensive editing capabilities.
  • Adobe Lightroom: For photo management and professional editing.
  • GIMP: A powerful free alternative.
  • Mobile Apps: Snapseed, VSCO, Adobe Photoshop Express for editing on the go.

Online Tutorials and Courses

  • Udemy and Coursera: Offer extensive courses on photo editing.
  • YouTube: A great resource for free tutorials and tips.
  • Blogs and Forums: Sites like Reddit, DPReview, and photography blogs provide valuable insights and community support.

Free and Paid Resources

  • Presets and Actions: Available from websites like Creative Market and Envato.
  • Stock Photos and Textures: Unsplash, Pexels, and Shutterstock offer high-quality images and textures for your edits.

Conclusion

Mastering the art of photo editing takes time and practice, but the results are well worth the effort. By understanding basic and advanced techniques, avoiding common pitfalls, and utilizing the right tools and resources, you can significantly enhance your editing skills.

Experiment with different styles, seek feedback, and continually refine your approach. Happy editing! Outsource The Photo Edit